We all know that hiking is an excellent exercise, but how is your physical health? Hiking gets your heart pumping and blood flowing, making it a great low-impact cardio workout that helps reduce your risk of heart disease, stroke, high blood pressure, and high cholesterol. At the same time, the terrain's inclines and declines help tone and tighten your legs, build muscle mass, and help prevent osteoporosis. Hiking can be great for your body, but you might not be feeling so positive the day after a big hike when dealing with muscle pain throughout your body. Thankfully, several muscle recovery exercises can be done after hiking to provide much-needed relief. Give these foam rolling exercises a try after your next trek or even after a walk or run. Your body will truly thank you.
Foam rollers can be purchased at most sporting goods stores or your favorite online retailer. A massage ball can be used for smaller areas like the feet. The denser the ball, the more intense the massage will be. If you do not have a massage ball, try using a tennis or lacrosse ball.
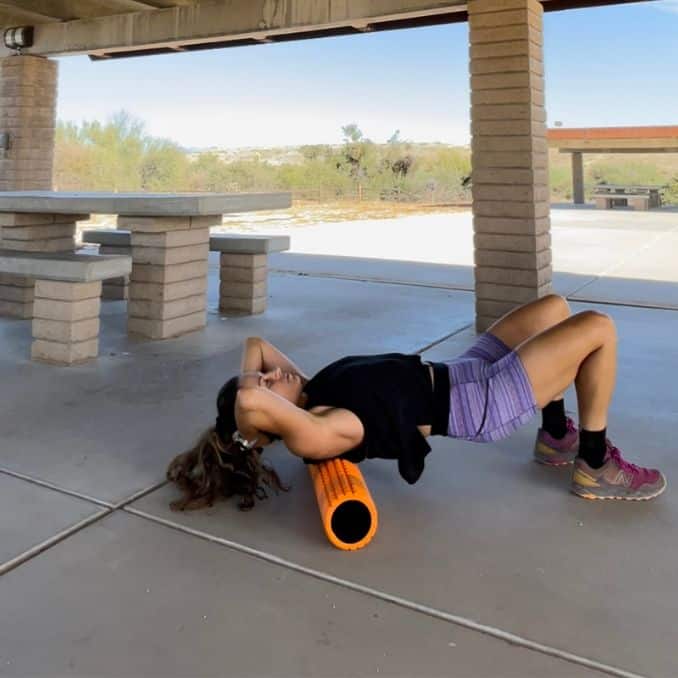
1. Foam Roll Back to Release Tension
Begin in an upright seated position on the floor with your legs bent and your feet flat on the floor. Position the foam roller behind your body, then lean back so the roller is across your lower back. Interlock your fingers behind your head or place your hands on your stomach. Slowly alternate bending and straightening your legs to move the foam roller up and down your back.
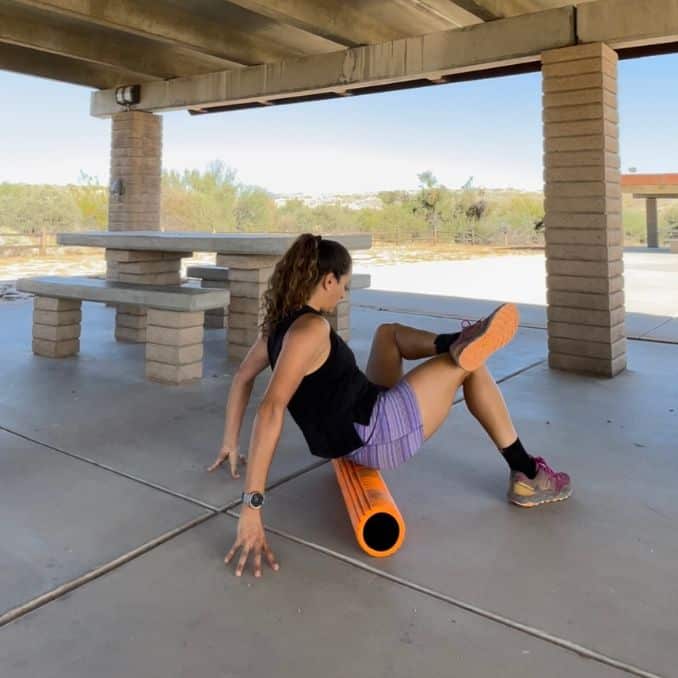
2. Foam Roll Glutes for Muscle Recovery
Begin in an upright seated position on top of the foam roller. Lean back and place both hands on the floor behind the roller for support. Lean your upper body to one side and cross your ankle over your opposite leg to put your weight on one cheek. Use your hands and supporting portion to roll over your glute muscles slowly. After several repetitions, repeat the movement on the opposite side. Foam rolling the glutes is one of the best muscle recovery exercises after hiking.
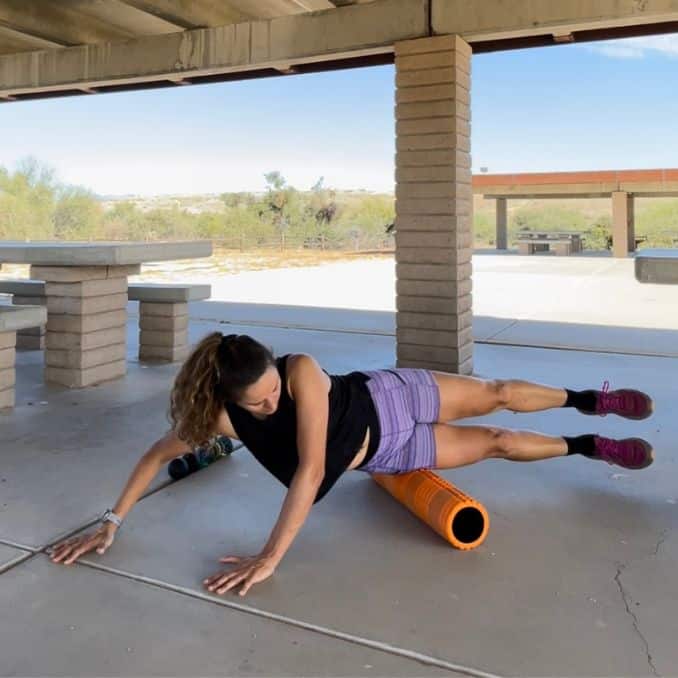
3. Foam Roll IT Bands to Decrease Tightness
Rolling your IT bands can be pretty intense, so be sure not to press too much of your body weight into your roller first. Begin in an upright sitting position on top of the foam roller. Move onto your side so the roller is positioned under one hip and supports your upper body on your forearm. Engage your core and straighten your bottom leg. Bend your top knee and plant your foot on the floor for support, either in front or behind your straight leg. If preferred, stack both legs on top of each other. Slowly roll from your hip down to just above your knee and back. Repeat the movement. After several repetitions, repeat the action on the opposite side.
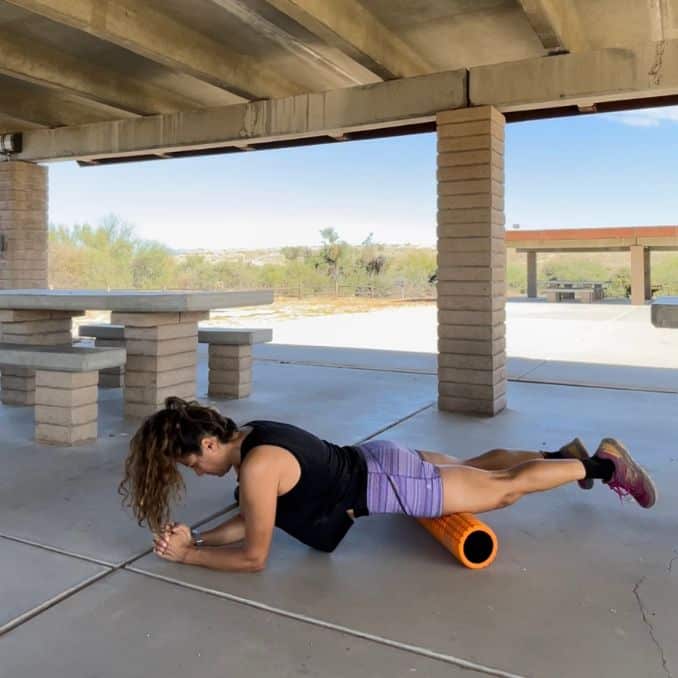
4 . Foam Roll Quads for Muscle Recovery
Begin by lying in a forearm plank position with the foam roller under your upper thighs. Resting your forearms, roll slowly down your legs, stopping just above your knees. Roll back up to the tops of your legs to complete one repetition. Be careful not to roll over your knee joints. Repeat the movement.
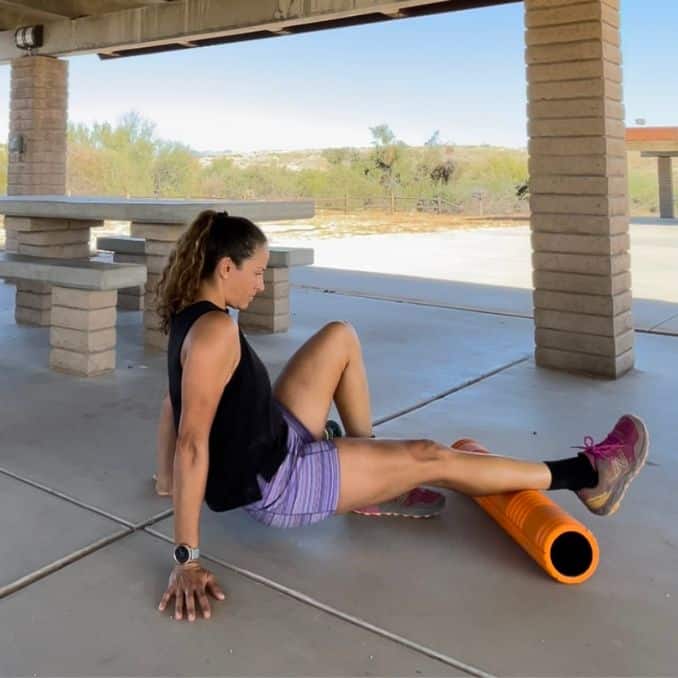
5. Foam Roll Calves for Tension Relief
Begin in an upright seated position on the floor with your legs bent and your feet flat on the floor. Plant your hands on the floor behind you for support. Use your arms and a bent leg to support some of your weight as you roll from just below your knee to slightly above your heel and back. Straighten one leg and place the foam roller under your calf. Repeat the movement. After several repetitions, repeat the action on the opposite leg.
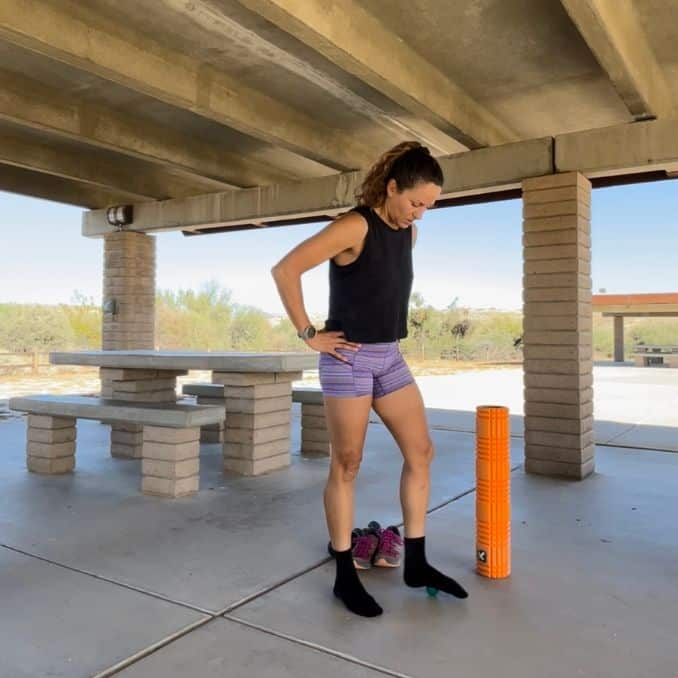
6. Ball Roll Feet for Healthy Feet
For this exercise, it is best to be barefoot.
Begin in an upright standing position with your feet shoulder-width apart, maintaining good alignment with your head, shoulders, hips, and legs. Place one hand against the wall or on the back of a chair for balance if needed. Step on the ball with one foot and slowly roll from your heel to your toes and back. Try to move through each metatarsal, pushing as much body weight into the ball as is tolerable. It should feel slightly uncomfortable. Keep rolling back and forth and spend extra time moving through tight spots. Repeat the movement on the opposite side. This is often one of the most underappreciated muscle recovery exercises, but a must-do after long periods on your feet.
If preferred, go through this exercise in a seated position.
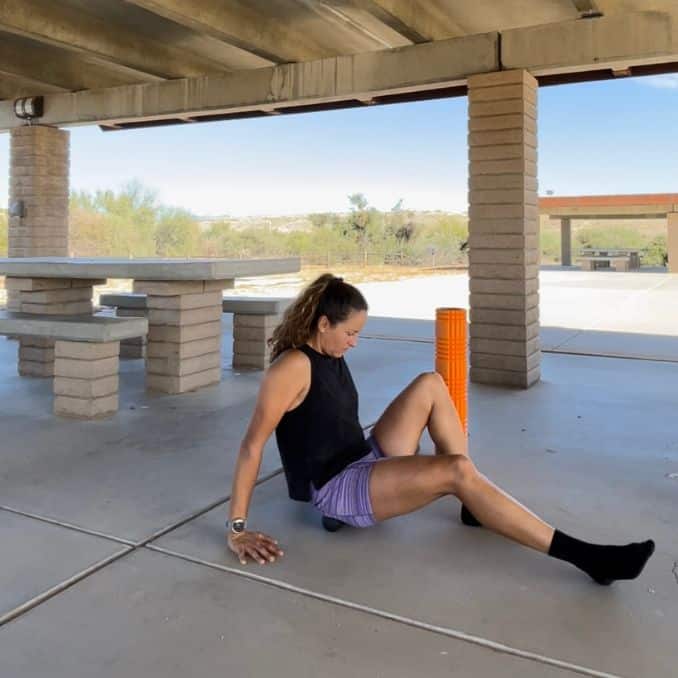
7. Ball Roll Piriformis for Muscle Recovery
Begin in an upright seated position on the floor with your legs bent and your feet flat on the floor. Plant your hands on the floor behind you for support. Straighten one leg and place the ball under your seat, near the top of your hip joint. Use your arms and a bent leg to support some of your weight as you roll over the ball, moving forward and back, then side to side. After several repetitions, repeat the movement on the opposite side.
A foam roller is a versatile and vital equipment for any home gym. Try leaving your roller by your couch and go through a few exercises during the commercial breaks of your favorite TV show. These recovery exercises feel so good that you might decide to make them an everyday activity. Foam rolling before bed is also an impactful way to loosen tight muscles, allowing for a deeper, more relaxing sleep.
Learn all of the best methods for reducing muscle soreness here.


