Gentle inversions, such as those found in the yoga practice, can help relax the body, providing it with a much-needed break. When your legs are higher than your heart, blood is encouraged to flow back to the heart to be reoxygenated. The process of blood flowing back to the heart is called venous return. This provides benefits to the circulatory system and is a gentler way to encourage venous return as you get older. Some experts even suggest that inversions allow blood to flow into the upper portion of the lungs, increasing your capacity to diffuse oxygen into your bloodstream and leading to healthier lung tissue. While you are inverted, you also give your heart a bit of a break. Normally, the heart works hard to pump blood up into your upper body, head, and brain. When you are inverted, the pressure differential across the body is reversed and blood can easily flow into these areas. You have receptors in your arteries called baroreceptors that detect blood pressure. These baroreceptors sense the increase in blood flow and signal to the brain to reduce blood pressure and heart rate. This in turn leads to a feeling of relaxation as the parasympathetic division of the nervous system takes over, which is the “rest and digest” portion of the autonomic nervous system.
Inversions such as handstands, headstands, or even shoulder stands have been shown to lead to chronic neck pain in practitioners. Thus, always do inversions at your own risk or talk to a health care professional first. The inversions in this article are gentler, but always listen to your body and skip any pose that causes pain or tension. Let your breath be your guide, and always back out of a posture if it constricts your breathing.
1. Waterfall
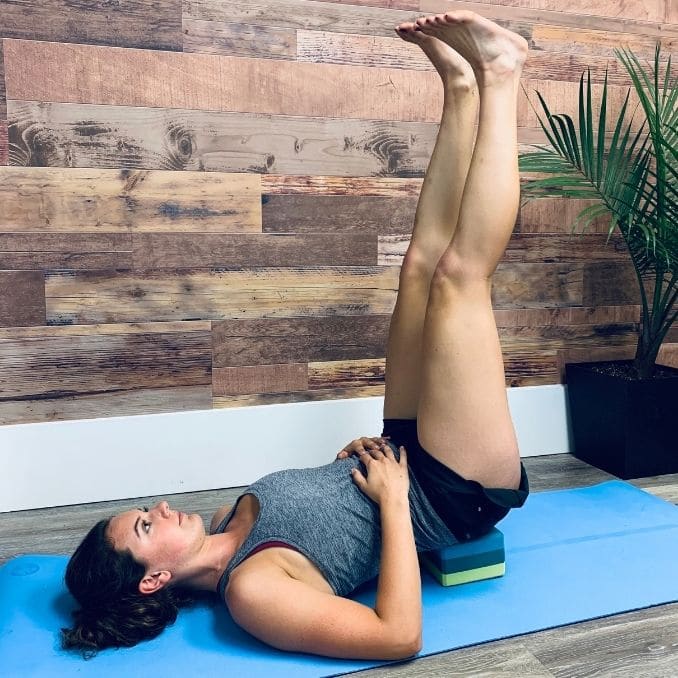
The waterfall is the perfect place to start with inversions. It is gentle and simple to get into, and most people can come into some variation of the pose.
Begin lying on your back on a yoga mat or other comfortable surface. Place support under your sacrum, the flat part of your lower back. This could be a yoga block, a folded towel, a pillow, a blanket, or anything else you have that is comfortable and makes you feel stable and supported. Draw your knees toward your chest, then straighten your legs over the top of your hips. It is okay if your knees have a slight bend to them. The goal is to have your legs floating effortlessly above you. The higher the support under your lower back, the easier this will be to achieve. Relax your entire body and breathe here.
Hold this position and breathe for 30 seconds to 5 minutes (as long as is comfortable).
Modifications: To make this posture easier, perform the ‘Legs Up the Wall’ pose. Begin by sitting next to the wall. The closer you are to the wall, the more of a stretch you may feel in the backs of your legs, so adjust accordingly. Lie on your back and extend your legs up the wall. Rest your feet on the wall, leaving a slight bend in the knees if that feels best. Breathe here.
2. Half Shoulder Stand
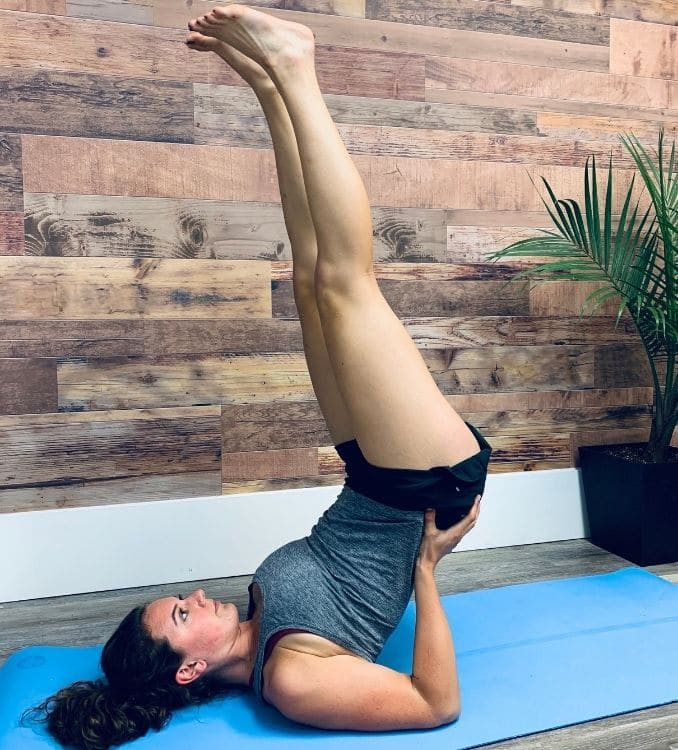
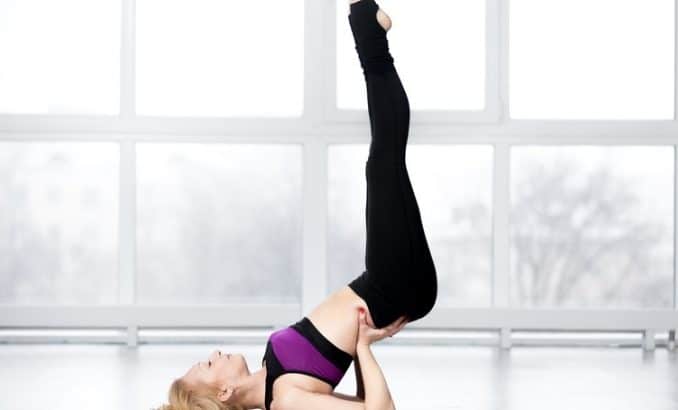
Half shoulder stand is the most advanced of the poses in this article, so please take your time and be aware of your body in this pose.
Begin by lying on your back. Bring your knees toward your chest as you lift your lower back off the floor, supporting it with your hands. Make sure you are supporting your weight between your shoulders and elbows, not your neck or head. Straighten your legs toward the ceiling. Make sure you can peel the back of your head off the floor, which ensures you are not placing too much pressure on the neck. Imagine energy through the soles of your feet, pulling them up toward the ceiling. Keep your gaze looking up and do not turn your head. Hold this position and breathe.
Hold this position and breathe for 15 seconds to 1 minute (as long as is comfortable).
Modifications: If this pose is not accessible, do Waterfall or Legs Up the Wall instead. If Full Shoulder Stand is in your practice and you can safely come into it, you may do that instead to make this more challenging.
3. Forward Fold
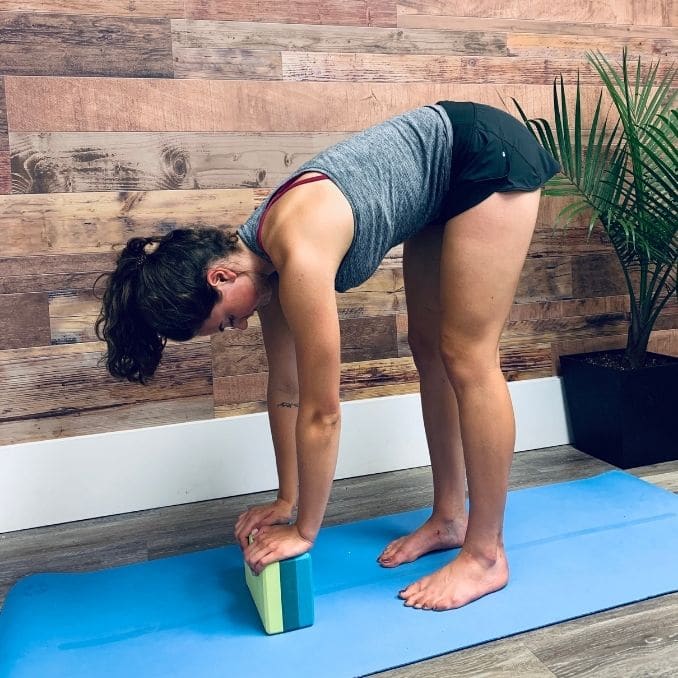
Forward fold is an inversion, as well as a great stretch for the entire back of your body.
Begin by standing with your feet hip-distance apart. With a slight bend in your knees, hinge forward at your hips to bend your upper body forward. If your hands do not reach the ground, use a block or other object to support your hands.
Hold this position and breathe for 30 seconds to 1 minute.
Modifications: For a more active version of the pose, engage your legs to lift your knee caps and use your core to fold further forward. For a gentler variation, allow your spine to round slightly as you drape yourself forward, like a ragdoll. You can even grab opposite elbows and sway side to side, up and down.
4. Wide-Legged Forward Fold
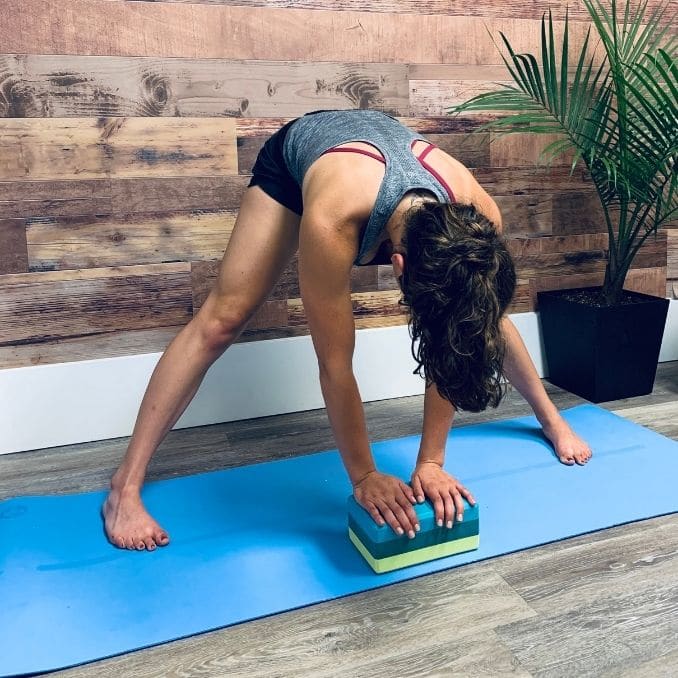
Like a traditional forward fold, the wide-legged forward fold not only gives you the benefit of an inversion but is also a great stretch in the legs.
Begin by finding a wide but comfortable stance. Angle your big toes slightly in and your heels slightly out. With soft knees, hinge forward at your hips, using a support under the hands if they do not reach the floor.
Hold this position and breathe for 30 seconds to 1 minute.
Modifications: For a more active version of the pose, engage your legs to lift your knee caps and use your core to fold further forward. For a gentler variation, allow your spine to round slightly as you drape yourself forward, like a ragdoll.
These are four inverted yoga poses you can use to relax and give your body a bit of a break. Remember to listen to your body and do not stay in any position that causes pain or discomfort.
Interested in trying Yoga but don't know where to start? Try the best introductory program available here.

